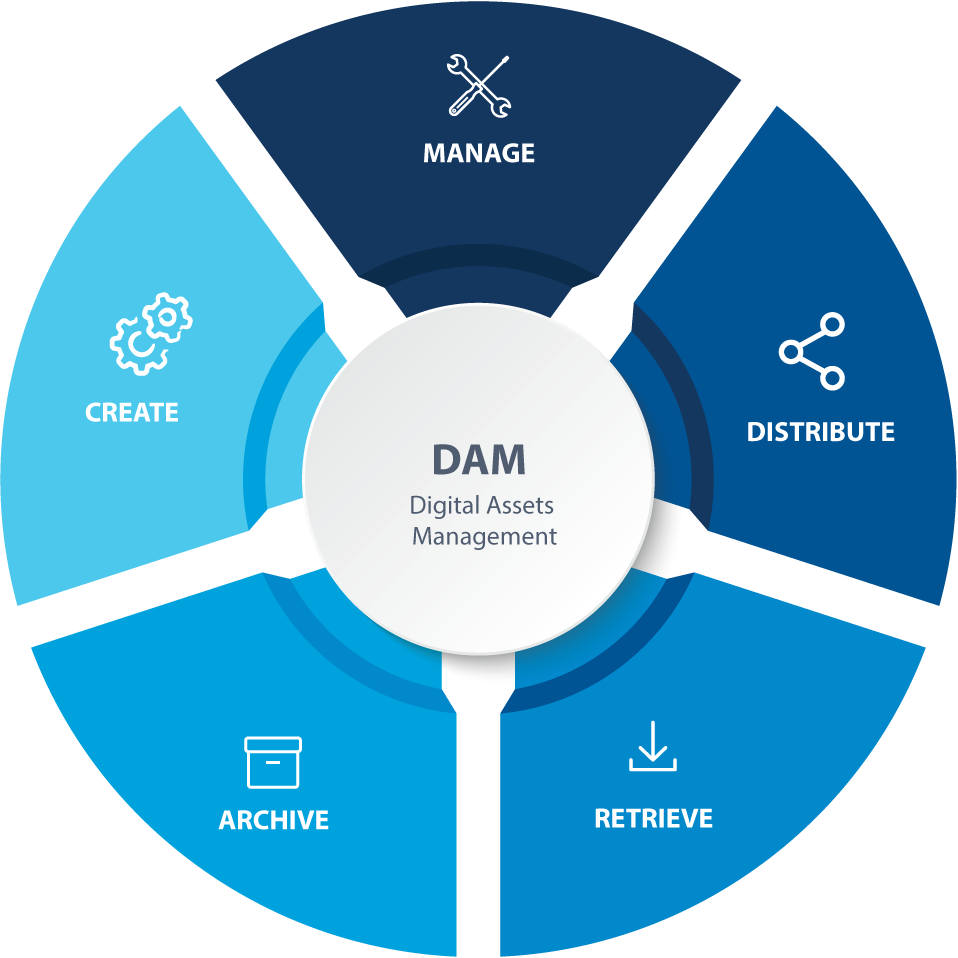
As businesses expand, managing digital content becomes increasingly complex. Traditional storage methods, such as local servers, file-sharing platforms, or shared drives, often create chaos in a growing organization. Digital content—whether it’s images, videos, documents, or other types of media—can become hard to track, manage, and collaborate on. This is where a Digital Asset Management (DAM) system comes into play. Transitioning to a DAM system is an important step in modernizing your business, streamlining digital workflows, and ensuring smoother content management.
In this blog, we’ll guide you through the process of migrating from traditional storage to a DAM system, step-by-step. We’ll also explore how Wizbrand, as a leading Digital Asset Management (DAM) solution, can ease this transition and improve collaboration across teams.
Why Migrate to a DAM System?
Before we jump into the step-by-step guide, it’s essential to understand why switching to a DAM system is crucial for modern businesses. Traditional storage methods are limited and inefficient, especially as content grows. For example:
- Disorganization: Files are scattered across different folders or drives, making it difficult to find assets when needed.
- Collaboration Issues: Teams may struggle to access, edit, or share the most up-to-date versions of assets.
- Security Risks: File access and control are harder to manage, leading to potential data breaches or unauthorized access.
A DAM system solves these problems by centralizing all digital assets in one accessible platform, where teams can collaborate effectively, manage versions, and ensure security. One of the best tools for this is Wizbrand, a powerful DAM software that helps businesses streamline workflows, enhance team collaboration, and manage digital assets with ease.
Step 1: Assess Your Current Storage System
The first step in migrating from traditional storage to a DAM system is to assess your current setup. Take an inventory of the files, folders, and digital assets that are currently in use across your organization. You need to evaluate the following:
- Types of Assets: What types of digital assets are you working with—images, videos, documents, audio files, etc.?
- Volume: How much content do you have? This will help determine the scale of your migration.
- Access: Who needs access to these assets? How do your teams currently access and share them?
- Organization: How are the files currently organized? Is there any existing metadata or tagging?
By understanding your current system, you can make more informed decisions on how to organize and migrate your assets effectively.
Step 2: Choose the Right DAM Solution
Selecting the right DAM solution is critical to ensuring a smooth migration. While there are various DAM tools available, it’s essential to choose one that suits your specific needs. Wizbrand offers an intuitive, cloud-based DAM platform designed to streamline digital workflows and improve content management.
Wizbrand provides a variety of features, including:
- Centralized Asset Management: Store all digital assets in one platform for easy access and organization.
- Search and Metadata Tagging: Quickly search for and retrieve assets by tagging them with relevant keywords, categories, and metadata.
- Collaboration Tools: Share and collaborate on assets with your team, ensuring everyone is working with the most up-to-date content.
- Security: Control access levels and permissions, ensuring only authorized users can access or modify specific assets.
Choosing Wizbrand as your DAM solution means you’ll benefit from one of the best DAM tools in the world, giving you the tools to enhance collaboration, streamline workflows, and keep your content secure.
Step 3: Plan Your File Structure and Taxonomy
The next step is to plan how your digital assets will be organized within your new DAM system. A well-structured taxonomy is essential for ensuring that files are easy to locate, edit, and share. Consider the following:
- Categories: Group your assets into logical categories. For example, you could have categories like “Marketing,” “Sales,” “Product Images,” “Videos,” etc.
- Naming Conventions: Establish consistent naming conventions for assets. This will make it easier to find and identify files later on.
- Metadata: Metadata helps with file identification and searchability. Consider using tags or keywords to describe your assets.
- Access Permissions: Assign access levels based on roles. For example, marketing may need access to all assets, while other departments may only need access to certain files.
Once you’ve determined your organizational structure, you can begin the process of migrating your assets into the DAM system.
Step 4: Migrate Your Assets
Migrating your digital assets into a DAM system can be a time-consuming process, but it’s critical for ensuring everything is organized properly. Here’s a step-by-step process for a successful migration:
- Prepare Your Files: Clean up your current storage system by deleting outdated or unnecessary files.
- Upload to DAM: Start uploading your assets into the DAM system, ensuring that each file is categorized, named correctly, and tagged with appropriate metadata.
- Bulk Import: If you have a large volume of assets, use bulk import options to speed up the process.
- Check for Errors: Ensure that files have been correctly uploaded and organized. It’s important to test the search functionality and access permissions at this stage.
Wizbrand’s user-friendly interface and robust import features make the migration process easier and more efficient, helping you get your assets organized without hassle.
Step 5: Train Your Team
Once your assets are successfully migrated, it’s essential to train your team on how to use the DAM system. This includes teaching them how to:
- Search for and retrieve assets using metadata and tags.
- Collaborate on projects by sharing assets and working on versions.
- Access permissions and file security settings.
Training your team ensures that they’re able to maximize the benefits of your new DAM system and avoid potential errors or inefficiencies.
Step 6: Optimize and Monitor
After your DAM system is up and running, monitor its usage and optimize it as needed. You should periodically review the following:
- Asset Usage: Track which assets are being used most frequently and make adjustments to your storage or taxonomy as needed.
- Team Feedback: Ask your team for feedback on how the system is working for them and make improvements where necessary.
- SEO Integration: Use Wizbrand’s SEO Management Software to manage SEO data for your assets, ensuring they’re optimized for search engines.
Conclusion
Migrating from traditional storage to a DAM system doesn’t have to be a daunting task. With the right approach and the help of Wizbrand’s powerful DAM software, you can streamline your workflows, improve collaboration, and enhance the management of your digital assets. Start the process today and experience the efficiency and security that a DAM system can bring to your business.
If you’re ready to make the move to a more organized and efficient way of managing your digital content, explore Wizbrand’s DAM platform today and see how it can transform your business .